Tube Fittings Installation Instruction
Tube Fittings Under 1" & 25mm
These instructions are suitable for any types of fittings.
First, insert the tube completely into the fitting body and finger-tighten the nut.
Then, make the nut at the 9’ o’clock position.
Finally, while holding the fitting body steady, wrench the nut 1-1/4 turns to the 12 o’clock position.
For sizes 1/8”, 3/16” and 4mm, wrench the nut only 3/4 turn to the 6 o’clock position.

How to install tube fittings near bends??
1. It is important to bend tube prior to installing tube fittings.
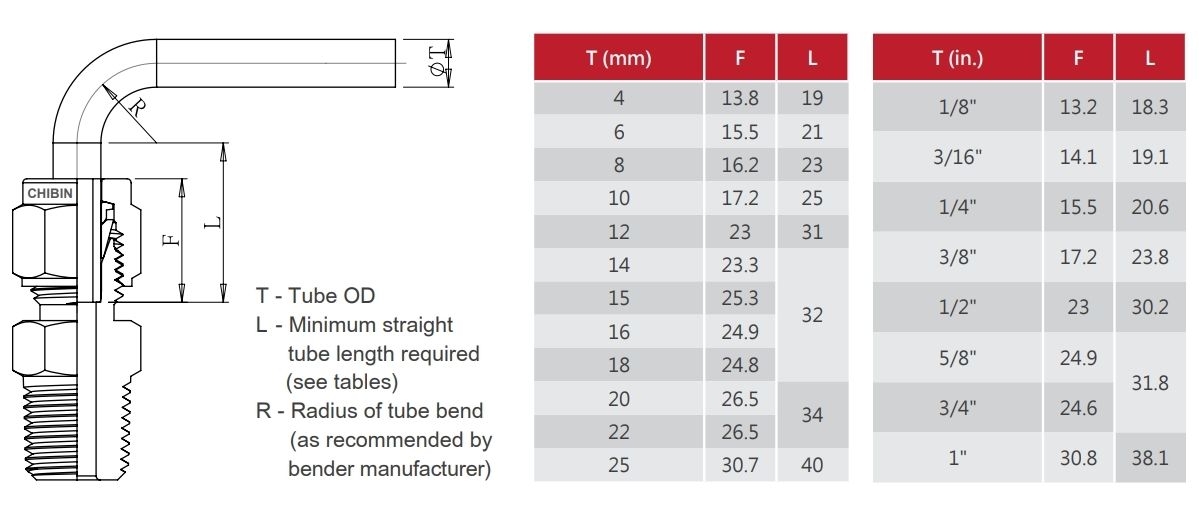
2. It must consider the insert depth into the tube fittings.(see "F" in the below table)
3. Reserve the minumum straight length of tube in order to allow the tube to be bottomed into the fittings.(See "L" in the below table)
Dimension "F" and "L" are suitable to tube OD.

Reassembly-suitable for all sizes
Tube Fittings capable of repeated disassembling and reassembling
Relieve system pressure before disassembling tube fittings.
First, mark the tube at the back of the nut and also mark a line on the flats of nut and fitting body before disassembling.The line is aimed to ensure returning the nut to its previously loosen position.
Then, insert the tube with preset ferrules into the fitting body until the front ferrule seats.
While holding the fitting body steady, wretch the nut to the previous marks on the tube and fitting body. Then continue to wrech the nut slightly to let its mark beyond the mark on the fitting body

